DIY vs. Professional Water Damage Stucco Repair: When to Call a Scottsdale Contractor
If your stucco shows stains, bubbling, or a spot that gives when you press it, the question is not whether to fix it. The question is whether to pursue DIY versus professional stucco approaches, and the honest answer depends on what is happening behind the wall, not just what you can see on the surface. In Scottsdale, the two usual culprits are monsoon rain hitting a wall that already has hairline cracks and a sprinkler head soaking the same patch of stucco twice a day for years. This guide walks you through a clear sequence: find the source, test the damage, handle what is safely DIY, and know the exact point where a contractor earns the money.
One note on scope. Stucco is not drywall. It is a cement shell over building paper and lath, and in Arizona it is still the dominant exterior; stucco covered 48% of new single-family homes started in the Mountain division in 2024, according to the National Association of Home Builders. That construction matters, because water damage in stucco almost always means the layers behind the cement have been compromised, and those layers are where DIY efforts usually fall short.
Step 1: Find and Stop the Water Source Before Touching the Stucco
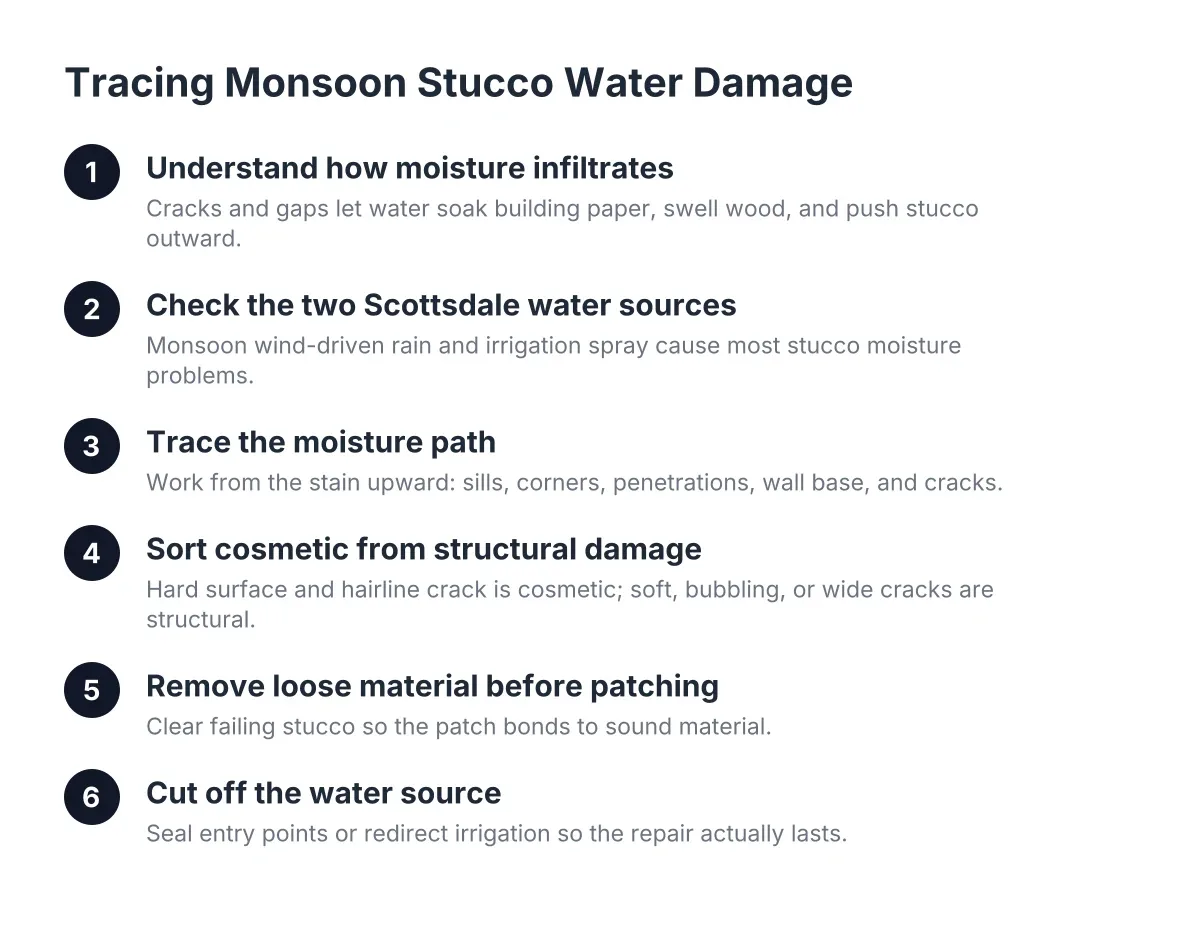
Patching stained or soft stucco without stopping the water is wasted money. The patch will fail the same way the original wall did. Therefore, start with the source, not the symptom.
In Scottsdale, check these in order:
- Irrigation. Walk the yard while the sprinklers and drip lines run. Look for any head that sprays the wall, an emitter leaking against the foundation, or a valve box that stays wet. Sprinkler damage to stucco is the single most common cause of soft spots within two feet of the ground.
- Roof and parapet drainage. After a monsoon storm, watch where scuppers and canales dump water. A scupper that sheets water down the face of a wall will stain and soften stucco in a vertical streak.
- Grading and ponding. Repeated heavy rain that pools against the foundation can cause slight settling, which then cracks stucco at corners and lets more water in. If water stands against the house for hours after a storm, that is a cause, not a coincidence.
- Penetrations. Check the sealant around hose bibs, light fixtures, window frames, and AC line penetrations. Failed caulk here is a frequent monsoon entry point.
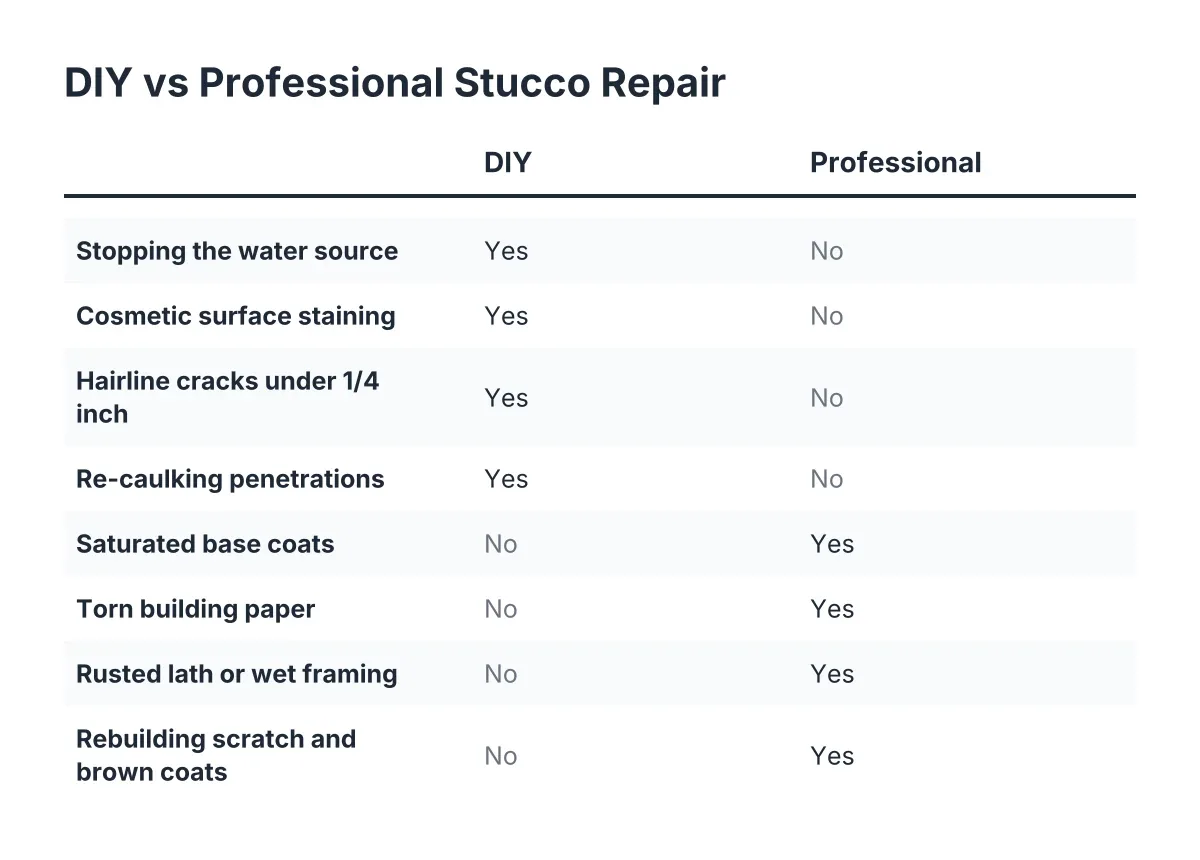
Stopping the source is squarely DIY. Redirect the sprinkler head, re-aim the scupper with a splash block, re-caulk the hose bib. Do this first, then let the wall dry for at least a week of dry weather before you judge the damage.
Step 2: Test How Deep the Water Damage Goes
Surface staining and deep saturation look similar from the driveway. The difference decides whether you patch it Saturday morning or call a contractor. Press firmly on the discolored area with your palm, then probe gently with a screwdriver.
You are sorting the damage into three tiers:
- Cosmetic. The stucco is hard, the screwdriver does not sink in, and the stain is dry to the touch. This is mineral staining or old moisture that has since dried.
- Shallow damage. The finish coat bubbles, flakes, or chalks off, but the material underneath is solid. Hairline cracks may radiate from the area.
- Deep damage. The wall feels soft or spongy, the screwdriver penetrates, chunks come loose, or you see a bulge. A musty smell near the spot suggests mold behind the wall.
Tier one and most of tier two are candidates for DIY. Tier three is not, and Step 5 explains why. In addition, note the location: damage at the bottom of a wall near irrigation usually means the moisture has been chronic, which pushes even modest-looking spots toward tier three.
Step 3: DIY Stucco Repairs You Can Handle
Some water-related stucco work is reasonable for a careful homeowner, and doing it promptly prevents the expensive version later.
Clean and seal surface stains. Once the source is fixed and the wall is dry, scrub mineral or water stains with a stiff nylon brush and a diluted cleaner, rinse, and let it dry fully. If the stain persists, a breathable masonry primer and matched paint will cover it.
Fill hairline cracks. For cracks under about a quarter inch, use a flexible elastomeric stucco crack sealant. For wider cracks, push a foam backer rod into the gap first; according to Sika, backer rod is a closed-cell foam cord that creates a backing inside the crack so the sealant can do its job. This matters before monsoon season, because every unsealed crack is an entry point when rain hits the wall sideways.
Re-caulk penetrations. Cut out failed sealant around pipes, fixtures, and window perimeters and replace it with a quality exterior sealant.
Do these on the shaded side of the day; Arizona heat skins sealants and patch material fast, which shortens your working time and weakens adhesion.
Step 4: Choosing Between DIY and Professional Stucco Repairs
The line sits at the building paper. Everything in front of it, meaning the finish coat and shallow cracks, is fair game for a homeowner. Everything at or behind it, meaning saturated base coats, torn paper, rusted lath, or wet framing, belongs to a contractor.
Here is why that line is firm. The building paper is the actual waterproofing layer; the cement is weather protection, not a water barrier. When a structural crack sits unrepaired for years, that paper turns brittle, and normal wall flexing can tear it. At that point the wall leaks every storm no matter how good the surface looks. Lapping new paper correctly into the old, tying new lath into existing lath, and rebuilding scratch and brown coats is skilled work. Applying those base coats is harder than it looks, which is why even experienced DIYers hire it out.
There is also a hidden-cost trap in cutting out damage yourself. A clean grinder cut through the stucco slices the lath flush, and a contractor needs torn, exposed lath to lap and weatherproof the patch properly. A clean cut forces them to open up more wall, which adds cost. So resist the urge to "prep" the opening before getting a quote.
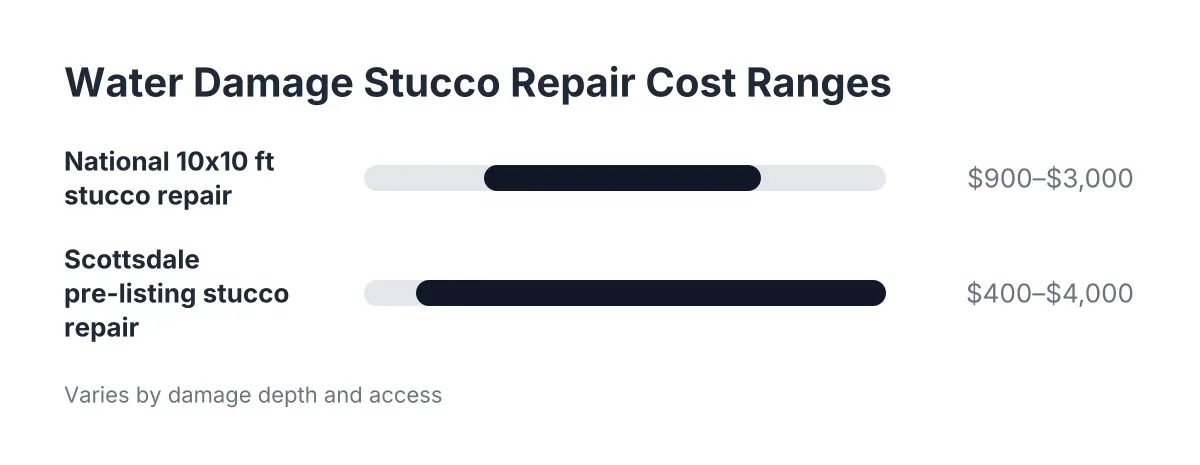
For context on budget, Fixr.com puts the national average cost to repair stucco at $900 to $3,000, averaging about $1,700 for a buckled 10×10-foot section of three-coat stucco. Compare that to the cost of a failed DIY patch that lets water keep reaching the framing for another two monsoon seasons.
Step 5: Call a Contractor for These Specific Situations
Certain findings end the DIY versus professional stucco debate on the spot. Call a stucco contractor, or in severe cases a water damage restoration company near me search may come first, if you find any of the following:
- Stucco that is soft, spongy, or crumbling under hand pressure
- Bulging or buckling sections, which mean the wood or lath behind has swollen
- A musty odor, visible mold at the patch, or moisture readings inside the house on that wall
- Rust streaks bleeding through the finish, which indicate wet, corroding lath
- Damage at a corner along with new cracking, which can signal settling from water pooling at the foundation
- Any damage below a window, where leaks commonly travel inside the wall before showing outside
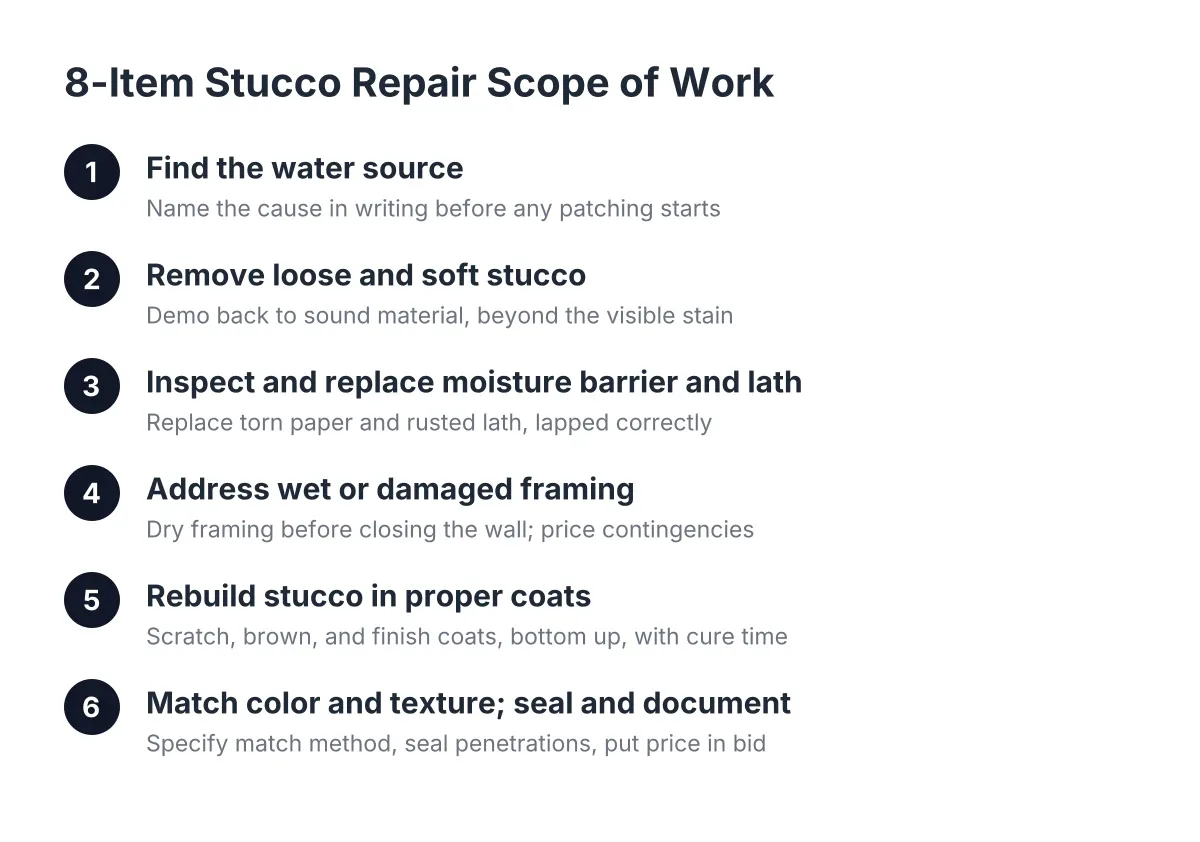
Suppose a Scottsdale homeowner who has owned their place since 2015 notices a soft, discolored band along the garage wall where a sprinkler has been hitting it. In that scenario, the right fix is not a skim coat. A contractor removes all loose and buckled material first, because leaving it in place lets every rain keep swelling the wood underneath. Then they assess the paper and lath, replace what is torn or rusted, rebuild the base coats working from the bottom of the repair upward, and finish with a texture and color match to the existing wall. Water Damage Stucco Repair done in that order holds; done in reverse order, it peels.
On corners specifically, there is a trade-off worth knowing before you approve a quote in 2026. A partial corner patch is quicker and cheaper, and it can be a fair choice if the water source is fixed. The technically correct repair is removing the stucco from corner to corner and repatching the full section. An honest contractor will explain both options and put the chosen scope in writing. If you suspect mold inside the wall cavity or damage to framing, bring in a professional assessment before anyone patches over it; sealing moisture inside a wall is the one mistake you cannot undo cheaply.
Step 6: Verify the Repair and Protect It Going Forward
After any repair, DIY or professional, check the texture match in raking morning or evening light. A patch that reads as a different texture usually means the original finish technique was not matched, and on a professional job that is worth raising before final payment.
Next, protect the fix. Keep sprinkler spray at least two feet off the walls, confirm drip emitters are not against the foundation, and walk the exterior each spring before monsoon season to seal new hairline cracks while they are still a ten-dollar fix. The homeowners who get decades out of their stucco are not the ones who never get cracks; they are the ones who treat every repair decision as a drainage problem first and a cement problem second.
If you need stucco repair, Scottsdale Stucco Repair can help.
Prefer to talk it through? Call (480) 637-3464 — a quick call is usually the fastest way to get a straight answer for your situation.