Emergency Stucco Hole Repair: When Water Damage Can’t Wait Until After the Listing
A hole in your stucco is never convenient, but a hole with water behind it is a different problem entirely. If your listing date is already set, or your HOA's reserve-study inspection just flagged damage on a community wall, an emergency stucco hole repair is about stopping water first and making the wall photograph clean second. This guide walks through the repair step by step, in the order a stucco contractor would actually do the work, so you know what a proper job looks like before you hire anyone or pick up a trowel.
Why the urgency? Stucco is the dominant exterior in this region. According to the National Association of Home Builders, stucco covered 48% of new single-family homes started in the Mountain division, which includes Arizona, in 2024. That means buyers, appraisers, and inspectors in Scottsdale know exactly what healthy stucco looks like, and they notice when a patch does not match.
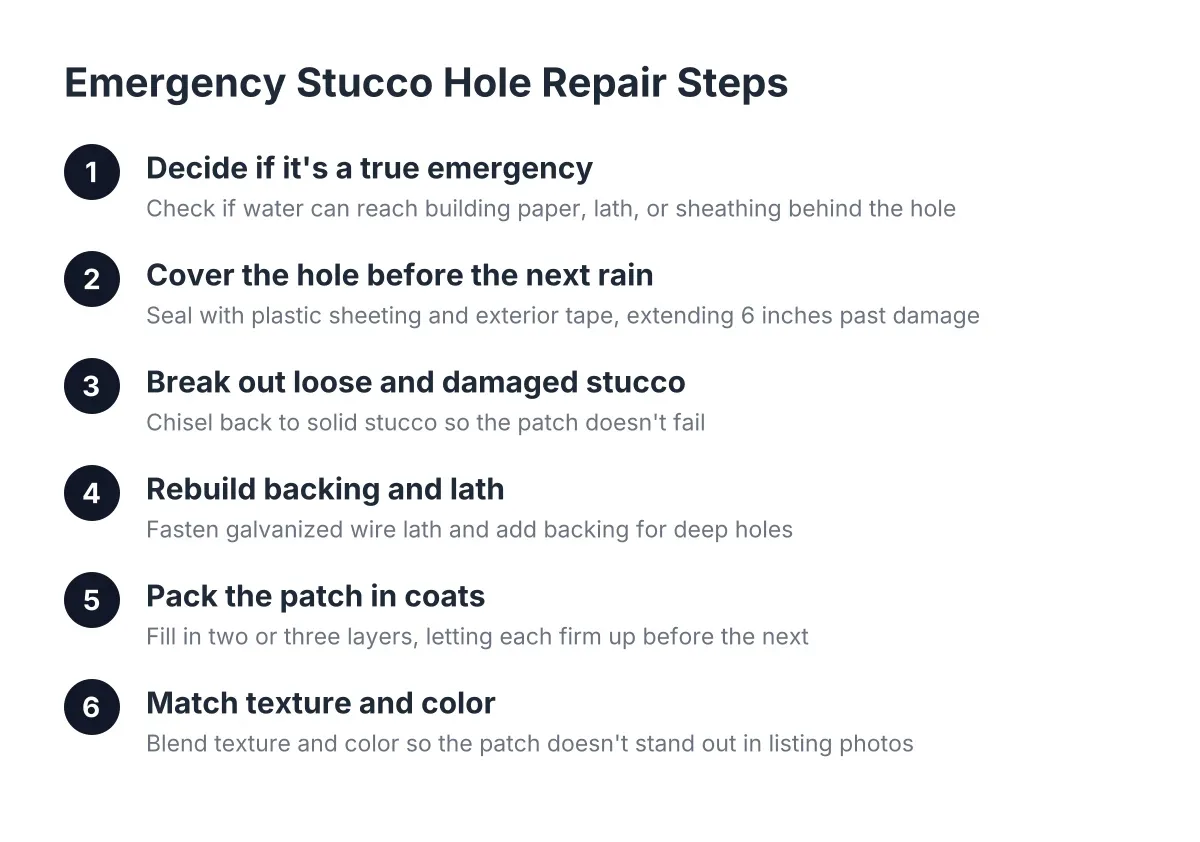
Step 1: Decide Whether This Is a True Emergency
A stucco hole becomes an emergency when water can reach what is behind the wall. The stucco itself is a weather shell; the building paper behind it is the real waterproofing. Once a hole exposes that paper, every rain or sprinkler cycle works on it. Left alone long enough, the paper turns brittle, and normal wall flexing can tear it. At that point you are no longer patching stucco, you are dealing with water damage repair inside the wall.
Treat the hole as urgent if any of these apply:
- You can see building paper, wire lath, or bare sheathing through the opening
- The stucco around the hole feels soft, hollow, or crumbles under light finger pressure
- There are brown stains or bubbling paint spreading from the hole
- The hole sits below a roofline, scupper, or anywhere water sheets down the wall
- Rain is in the forecast before a permanent repair can happen
However, a shallow chip that only breaks the finish coat, with solid color-coat stucco behind it, can usually wait for a scheduled repair. The glossary and cause guides in this series cover how to tell the coats apart.
Step 2: Cover the Hole Before the Next Rain
If permanent repair is days away, protect the opening now. Tape heavy plastic sheeting or a cut piece of poly over the hole, sealing all four edges with exterior-grade tape so water cannot run behind it. Extend the plastic at least six inches past the damage on every side. On a hole near grade, redirect drip irrigation heads away from the wall until the patch cures.
This temporary cover matters more than it looks. Preventing water from getting behind the stucco is the single most important goal of any penetration repair, whether the hole came from a removed light fixture, a ladder strike, or a pack rat chewing through a soft spot. A dry cavity patches cleanly; a wet one grows.
Step 3: Break Out All the Loose and Damaged Stucco
Resist the urge to smear patch compound over a ragged hole. Before anything goes on the wall, everything loose must come off. Use a cold chisel and hammer to chip back to stucco that sounds solid when tapped. Hollow-sounding material, even if it looks intact, has already separated from the lath and will fail under a new patch.
This is the step homeowners skip most often, and it is why so many patches crack again within a year. Leaving buckled or loose stucco in place traps a path for rain to keep expanding any damp wood or framing behind it. A patch over bad material is a cosmetic bandage with a countdown timer.
While the hole is open, check the building paper. Small tears can be lapped with new paper or flashing tape, shingle-style, so water sheds down and out. If the paper is shredded across a wide area, or the sheathing behind it is soft, stop. That repair belongs to a professional, because fixing it wrong routes water into the wall for years.
Step 4: Rebuild the Backing and Lath for Emergency Stucco Hole Repair
A hole bigger than a golf ball needs something for the new stucco to grab. Cut a piece of galvanized wire lath slightly larger than the opening and fasten it to solid material around the edges. On corner damage, which is common on garage returns and HOA perimeter walls, the sound method is to drill through both faces of the corner and tie wire through so the two patched sides reinforce each other instead of cracking apart at the edge.
For deep holes, a backing layer keeps the first coat from falling into the cavity. Hardware stores stock everything a small patch needs: patch compound, latex bonding additive, and corner mesh are all standard items at general home centers. For narrow gaps and cracks rather than holes, a closed-cell foam backer rod gives sealant a proper foundation inside the opening, a standard practice noted by Sika.
Step 5: Pack the Patch in Coats, Not One Pass
Fill the hole in two or three layers rather than one thick dump of material. Push the first coat firmly into the lath so it keys behind the wire, then scratch the surface while it is still soft so the next coat bonds. Let each layer firm up before the next. One overloaded pass sags, shrinks, and cracks down the middle as it cures, which is exactly the flaw an appraiser's camera catches in afternoon light.
Tape off adjacent surfaces first, including window frames, light fixtures, and any painted trim. Patch material that smears onto clean surfaces creates its own cleanup problem and telegraphs "amateur repair" in listing photos. Work in the morning during warm months; stucco that dries too fast in direct Arizona sun cures weak.
In addition, respect working times if you use fast-set products. Catalyzed body-filler-type compounds begin setting up within about 2 minutes of mixing, according to 3M, so mix small batches you can place immediately.
Step 6: Match the Texture Before Anyone Judges the Color
Texture is what makes a patch invisible or obvious. A smooth patch on a textured wall shows from the street no matter how good the paint match is. Most Scottsdale homes carry a sand, lace, or knockdown dash finish. A knockdown dash repair, for example, is done by spraying finish material onto the cured patch and then lightly troweling the high points flat so they blend into the surrounding wall.
Practice the texture on a piece of scrap or cardboard before touching the wall. Then feather the new texture a few inches past the patch edges so there is no hard border. This is the skill gap where professional stucco texture matching earns its fee; a contractor who patches walls weekly can replicate a 1990s lace finish that a weekend attempt cannot.
Step 7: Color Match, or Paint the Full Wall Plane
Here is the honest trade-off. Stucco color matching on a spot patch is never guaranteed to be perfect, because the surrounding wall has faded for years under desert sun while your patch is brand new. Integral color in the finish coat gets close. Paint gets closer. But the only way to make a patch truly disappear in photos is to paint the entire wall plane, corner to corner, so there is no edge for the eye to catch.
Suppose a seller in McCormick Ranch has a fist-sized hole where an old satellite mount came off, with photos scheduled in ten days. In that scenario, the smart sequence is: patch and texture in the first few days, let the repair cure, then repaint that full wall face in the final week. The result reads as fresh maintenance rather than concealed damage, which is the impression that passes inspection without red flags. The same logic applies to an HOA entry monument before a community event; patch the impact damage, then recoat the whole monument face.
What Emergency Stucco Hole Repair Costs in Context
Emergency stucco hole repair usually lands within the normal range for stucco repair work; the urgency affects scheduling more than the bill. For broader context, Fixr.com puts the national average cost to repair stucco at $900 to $3,000, averaging around $1,700 for buckled three-coat stucco in a 10×10-foot area. A single small hole typically costs less than that; a hole with water damage behind it costs more, because the hidden repair is the real work.
For a pre-sale fix, weigh the repair cost against what the damage does to the sale. A visible hole invites inspection scrutiny, lowball offers, and repair credits that usually exceed the cost of fixing it before listing. For an HOA board gathering bids in 2026, ask each bidder to separate the emergency stabilization from the finish work, so the board can approve the urgent portion fast and vote on the cosmetic scope on its normal schedule.
When to Call a Pro Instead of Finishing the Job Yourself
Some situations outgrow a DIY patch, no matter how careful the work. Bring in a stucco repair contractor when:
- The hole exposes torn building paper or soft, water-damaged sheathing
- The damage sits at a corner, around a window, or near an electrical panel
- The surrounding stucco sounds hollow across an area wider than the hole itself
- A previous patch failed, cracked, or never matched, and this is your last chance before photos
- The wall belongs to HOA common property, where documented, insured work protects the board
One more check after any repair, yours or a contractor's: press the cured patch firmly with a finger. A patch that gives, flexes, or can be punctured under light pressure failed in the material or the application. The fix is to break it out and redo it, not to skim another coat over the top. A professional repair should leave a surface as hard as the wall around it, with texture and color that hold up in full sun and a 10-foot walkaway test.
Done in this order, cover the water path, remove the bad material, rebuild the backing, patch in coats, match the texture, then unify the color, an emergency stucco hole repair ends up looking like routine upkeep instead of a problem someone hid. That is the standard to hold any repair to, whether the deadline is a listing date, an appraisal, or a board meeting.
If you need stucco repair, Scottsdale Stucco Repair can help.
Related guide: Stucco Hole Repair — Complete Guide
Prefer to talk it through? Call (480) 637-3464 — a quick call is usually the fastest way to get a straight answer for your situation.