How to Identify the Stucco Texture on Your Scottsdale Home Before Any Repair or Match
A stucco patch that matches in color but not in texture will show forever. Paint cannot hide it; sunlight makes it worse. That is why the first real step in any repair or block-wall project is to identify the stucco texture your home already has. Get that right and a patch disappears into the wall. Get it wrong and you will see the outline of the repair every time you pull into the driveway. This guide walks you through exactly how to name the finish on your existing walls, the way a stucco contractor would, so any new work blends in instead of standing out.
This matters even more if you are not repairing at all but adding new stucco. Say you just built a block wall or a room addition and the contractor left the block bare. To make that new wall look like it has always been part of the house, the finish coat has to copy the texture on your existing exterior, not just the color. Stucco is not rare in Arizona; according to the National Association of Home Builders, it was still used on 48% of new single-family homes started in the Mountain division in 2024. But common does not mean uniform. Scottsdale neighborhoods built across five decades carry at least four distinct finish families, and knowing which one is on your walls is the whole game.
Why Texture Matters More Than Color in a Stucco Match
Color can be corrected later. If a patch dries a shade off, you can paint the wall and the color problem is gone. Texture cannot be painted over. A smooth patch in the middle of a lace wall, or a heavy dash patch on a sand-finish wall, reads as a scar no matter what color goes on top of it.
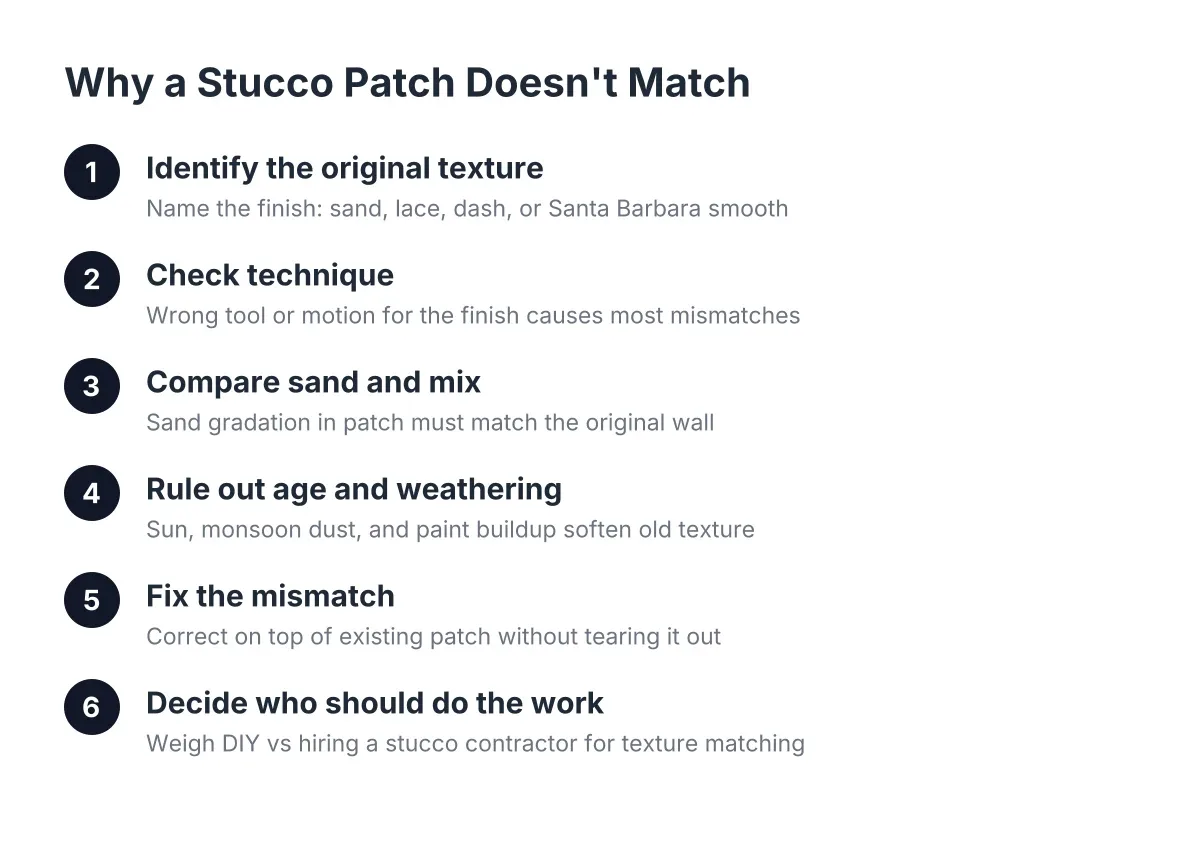
Texture mismatch is a cosmetic problem, not a structural one. A patch that looks wrong is not necessarily failing; it usually means whoever did the earlier repair did not copy the original technique or finish type. That is worth knowing before you panic about a bad-looking patch on a wall you just bought. The wall may be sound. The finish work was just rushed.
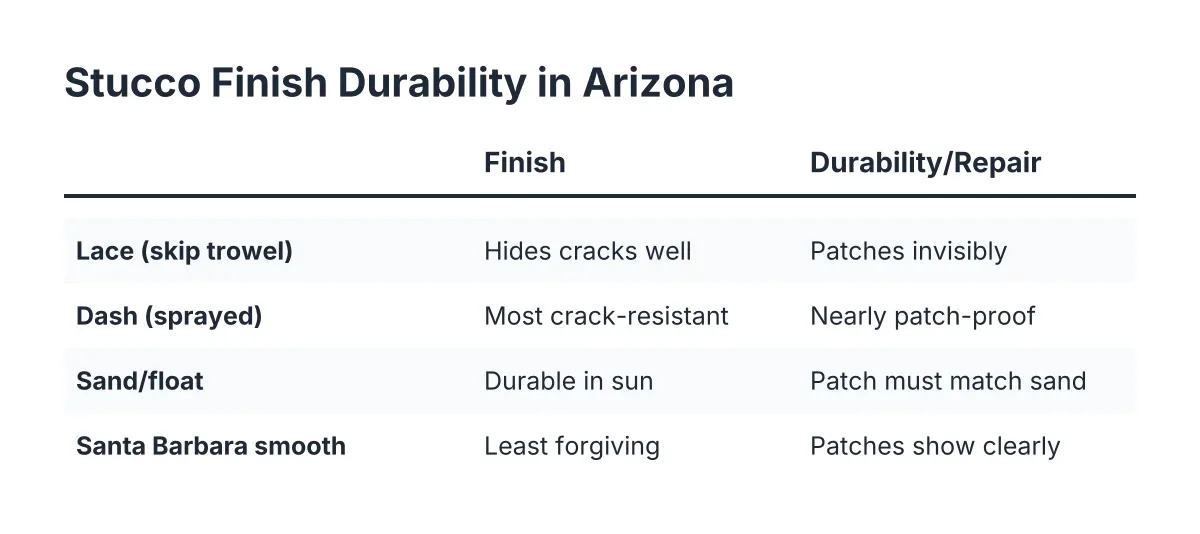
This is also why texture drives the difficulty of a repair. Flattened, textured finishes like knockdown lace forgive small imperfections in a patch; the surrounding texture absorbs them. Smooth finishes like Santa Barbara forgive nothing. Every trowel line telegraphs through. So the texture on your wall determines not only what technique the repair needs, but how hard an invisible result will be to achieve.
How to Identify Stucco Texture on Your Existing Walls
You can identify the stucco texture on your home in about ten minutes with good light and a close look at three or four spots. You are looking for two things: how the surface was built up, and whether it was flattened afterward. Those two questions separate almost every finish common in Scottsdale.
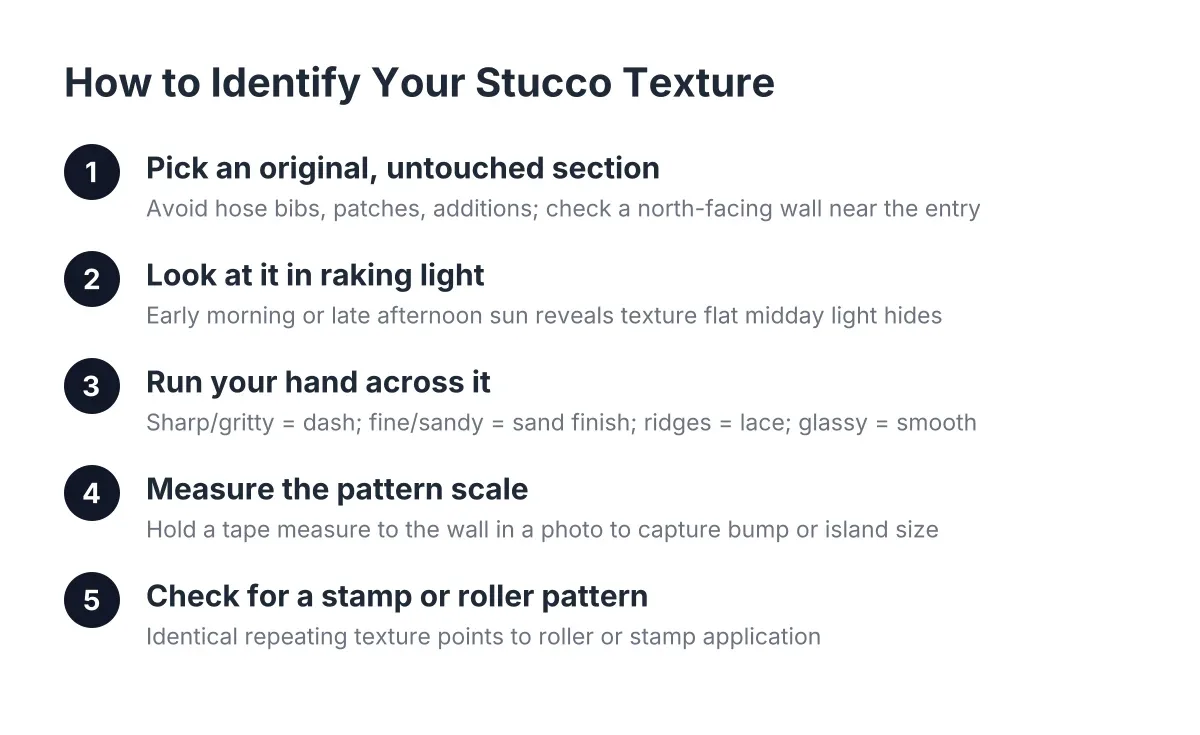
Start with these steps:
- Pick an original, untouched section of wall. Avoid areas near hose bibs, patched spots, or additions. A north-facing wall near the front entry usually holds the original finish with the least weathering.
- Look at it in raking light. Early morning or late afternoon sun hitting the wall at a low angle reveals texture that flat midday light hides. Take photos then; they are the ones a contractor can actually read.
- Run your hand across it. Sharp and gritty points to dash. Fine and sandy points to a sand or float finish. Rounded ridges and flat plateaus point to knockdown lace. Glassy and hard points to a smooth troweled finish.
- Measure the pattern scale. Hold a tape measure against the wall in a photo. The size of the bumps or islands matters; a fine lace and a heavy lace are different finishes to reproduce.
- Check for a stamp or roller pattern. If the texture repeats in an identical pattern, it was applied with a roller or stamp rather than a trowel or dash brush. Repeating patterns are less common in Scottsdale but they exist on some production homes.
While you are at the wall, do one more check that has nothing to do with texture. Tap across the area you plan to repair and listen. A solid sound means the stucco is bonded to the substrate. A hollow sound means it has detached, often because a bonding agent was skipped, and the repair will need to go deeper than the finish coat. Texture matching a patch over detached stucco wastes the work.
The Four Finish Families Common in Scottsdale
Most Scottsdale exteriors fall into one of four families. Here is how each one looks and feels up close.
Sand finish (float finish). A uniform, fine-grained surface, like coarse sandpaper spread evenly across the wall. There are no ridges, no islands, and no flattened areas. It is finished with a float while the material is still workable, and the fineness of the sand in the mix controls the grain. This is the finish where sand selection makes or breaks the match; a patch mixed with coarser sand than the original will read as a rough square even from the street.
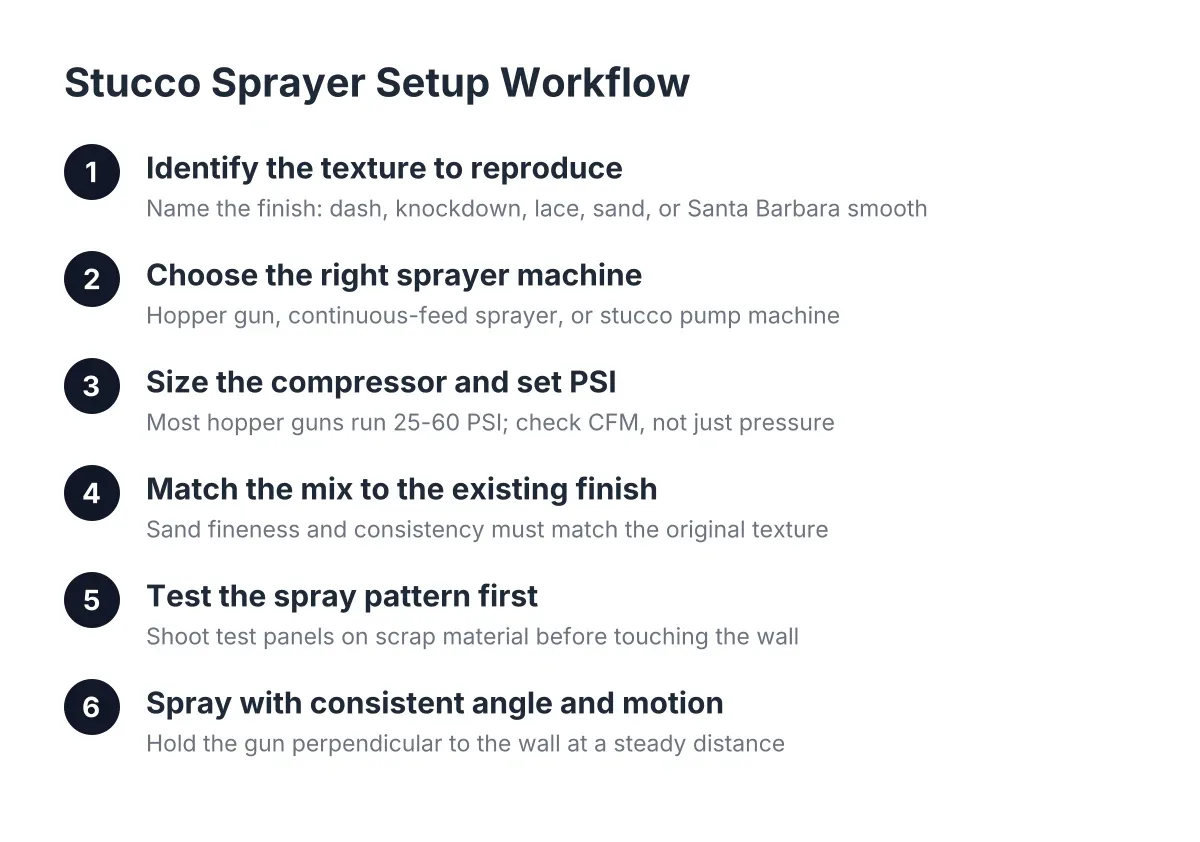
Dash finish. Sharp, pebbly, and irregular, dash is thrown or sprayed onto the wall rather than troweled. Older Scottsdale homes often carry hand-dashed texture applied with a stucco dash brush, which flicks the material on in a random spatter. Newer work is usually a spray stucco texture from a hopper gun. Hand dash and machine dash look different up close, and the pattern density varies with the applicator's rhythm, which is why dash is one of the harder finishes to copy convincingly.
Lace (skip trowel or knockdown). The most common finish across Scottsdale and much of the Southwest. Material is dashed or troweled on in irregular globs, then knocked down with a trowel so the high points flatten into smooth islands with rough valleys between them. A lace stucco finish varies in scale from fine to heavy; the flattened islands might be the size of a dime or the size of your palm. If your wall has flat plateaus with rougher texture in between, you have lace.
Santa Barbara smooth. A hand-troweled finish with soft, subtle motion in the surface and no aggregate texture at all. It is common on newer custom homes and higher-end Scottsdale builds. The Santa Barbara stucco finish is the least forgiving to patch because every imperfection shows; a patch here often needs the finish coat feathered well beyond the damage, or refinished to a natural break line, to disappear.
Sand Finish vs Smooth Stucco: The One Test That Settles It
The distinction between sand finish and smooth stucco confuses more homeowners than any other pair, and the fingertip test settles it. Drag a fingertip lightly across the wall. Sand finish feels like fine grit paper because the aggregate sits at the surface; smooth stucco feels hard and slick, like polished plaster. If you feel grain, it is sand finish. If you feel glass, it is smooth.
Why does the difference matter so much? Because they are repaired with different materials and different tools. Sand finish repairs live or die on matching the sand gradation in the mix. Smooth finish repairs live or die on trowel technique and where the patch edges land. A contractor who quotes both jobs the same way has not looked at your wall closely.
Matching Texture When You Stucco a New Block Wall
Stuccoing a bare block wall is an installation job, not a repair, but the texture question is identical. The finish coat on the new wall must copy the finish on the house or the wall will always look like an add-on. Once you identify the stucco texture on your house using the steps above, that finish becomes the specification for the new wall, and the installer's job is to reproduce it at full-wall scale.
The good news is that block walls take stucco well. The block gets a bonding treatment or a scratch coat keyed into the surface, then a brown coat to flatten the wall, then the finish coat where the texture happens. You do not need to know the nails or lath details yourself; that is the installer's problem. What you need to bring to the conversation is the name and scale of your existing texture, plus daylight photos of an original wall section.
Suppose a homeowner in McCormick Ranch finishes a backyard block wall extension and the mason leaves it bare, telling them stucco is a separate trade. The house has a medium lace finish from the late 1990s. In that scenario, the right ask is not "stucco the wall" but "match the medium knockdown lace on the house, and let's confirm the sample against the west wall before you texture the whole run." That one sentence, informed by ten minutes of looking at the existing walls, is the difference between a wall that blends and a wall that announces itself.
There is one expectation worth managing. New stucco will not instantly match twenty years of weathering on the house, even when the texture is copied correctly. Texture can be matched on day one. The weathered patina takes time, or a coat of paint across both surfaces, to fully even out.
When a Patch Still Shows: Blending, Knockdown, and the Paint Fallback
Even a competent repair can dry looking slightly proud of the surrounding wall. Before assuming the patch has to come out, know that a texture that sits too high can often be blended by knocking down and scraping the high spots once it has set, without removing the base coat. This is a normal finishing step, not a sign the repair failed. Skilled finishers expect to tune a patch after it firms up.
However, some mismatches cannot be tuned. A sand-finish patch on a lace wall, or a machine-sprayed dash next to hand-dashed original work, will not blend by scraping. In those cases the honest fixes are refinishing the patch with the correct technique, or accepting the fallback: paint the entire wall or a full section to a natural break line, such as a corner or control joint. A uniformly painted wall with a faint texture variation beats a color-matched patch with the wrong texture every time.
Keep the cost context in mind when weighing these options. According to Fixr.com, the national average cost to repair stucco runs $900 to $3,000, averaging about $1,700 for a buckled three-coat area of about 10 by 10 feet. Texture-matched finish work sits inside that kind of range for most residential patches; refinishing a whole wall section to hide a bad match costs more, which is exactly why identifying the texture correctly before the first repair is the cheapest step in the entire process.
For deeper cracks, the repair sequence also matters to the final texture. A crack that gets filled flush with sealant alone often telegraphs back through the finish. Wider cracks are typically backed before sealing; backer rod, a closed-cell foam cord, creates a backing inside the crack before sealant goes in, according to Sika. The texture coat then goes over a properly built repair, not straight over a smear of caulk.
What HOA Boards Should Require in a Texture-Match Bid
Community perimeter walls and entry monuments make texture matching a documented requirement, not a handshake understanding. A shared wall that runs 800 feet past forty backyards will show every mismatched patch to every resident who walks the path. When a reserve-study inspection or a resident complaint flags cracking on common-area stucco, the board's bid package should force texture onto the page.
Ask each bidder to state, in writing:
- The named finish type they identified on the existing wall (sand, dash, lace, or smooth), with the scale noted, such as fine, medium, or heavy.
- The application method they will use to reproduce it: hand trowel and knockdown, hopper spray, or hand dash with a dash brush, matched to how the original was applied.
- A sample panel requirement. A test patch of two to four square feet on the actual wall, approved by a board representative in daylight, before full production work starts.
- The blending plan if the match is imperfect: knock down and scrape, refinish to a control joint, or paint the full section, with the decision rule stated up front.
- The uniformity plan across visits. If repairs happen in phases across budget years, the same finish specification carries forward so year-three patches match year-one patches.
For example, picture a 200-unit community whose reserve study flags spalling and cracks along a lace-finished perimeter wall. Three bids come in; two say "patch and texture to match" with no detail, and one names the finish as medium knockdown lace, commits to a sample panel at the entry monument, and states that any section with more than three patches gets painted corner to corner. That third bid is the one a board can actually hold a contractor to, and it is the one that avoids a checkerboard wall two summers later.
This level of specification is where a focused local contractor earns the job. Stucco texture matching is a distinct skill within stucco work, and bids that treat it as an afterthought tend to produce the patchwork walls boards end up rebidding.
Documenting Your Texture Before You Call Anyone
Ten minutes of documentation makes every conversation that follows faster and every bid more accurate. Whether you are a homeowner with a bare block wall or a board member scoping a common-area repair, put together a small texture file before requesting bids.
Include four things. First, three photos of an original wall section in low-angle light, one wide, one at arm's length, and one close enough to see individual grain or islands, with a tape measure in frame. Second, the finish name you settled on from the families above, plus your best read on scale. Third, photos of the damage or the bare block itself, so the scope is clear. Fourth, a note on anything that sounded hollow when you tapped it, because that changes the scope from finish work to bonding repair.
One honest caveat: visual identification gets you the finish family, but subtle variables like sand gradation, applicator technique, and decades of weathering are judgment calls that an experienced finisher confirms on a sample panel at the wall. If your finish does not clearly fit any family, or if the wall sounds hollow across large areas, bring a professional in before committing to a repair approach. Your documentation is still the starting point; it just is not the last word.
Do this work up front and you flip the usual dynamic. Instead of hoping a contractor notices your texture, you hand them the specification. The patch on your house blends, the new stucco on your block wall reads as original, and the community wall stays one continuous surface instead of a record of every repair visit. In a region where stucco covers roughly half of new homes, the difference between average work and invisible work comes down to naming the texture before the first trowel touches the wall.
If you need stucco repair, Scottsdale Stucco Repair can help.
Prefer to talk it through? Call (480) 637-3464 — a quick call is usually the fastest way to get a straight answer for your situation.