Stucco Wall Assessment Checklist: What to Inspect Before You Repair or Drill
Before you patch a hole, hang a TV mount, or call for a repair quote, you need to know what your wall is made of and what shape it is in. This stucco wall assessment checklist walks you through both. It covers how thick your stucco should be, what sits behind it, and the specific checks that tell you whether you are looking at a cosmetic patch or a water problem that has already reached the paper behind the wall. If you are a Scottsdale homeowner staring at a crack that grew over the summer or a hole from a ladder, this is the walkthrough to do before anyone gives you a number over the phone.
That last point matters. Plenty of homeowners get quoted for stucco repair by someone who never looked at the wall. A quote like that is a guess. The checks below take about an hour with tools you already own, and they put you in a position to describe the damage accurately, judge whether a quote makes sense, and know when a small patch is honestly enough.
Why Scottsdale Homes Need Their Own Assessment Approach
Stucco is not a niche material here; it is the default. According to the National Association of Home Builders, stucco remained the most-used exterior wall material in the Mountain division, which includes Arizona, at 48% of new single-family homes started in 2024. Nationally, the U.S. Census Bureau's 2024 Survey of Construction found stucco accounted for about 27% of principal siding on homes that began construction in 2023.
The Sonoran climate works on that stucco in a specific pattern. Summer heat expands the wall during the day and lets it contract at night, which is why hairline cracks near windows tend to grow a little every season. Then monsoon rain arrives, driven sideways by wind, and finds every one of those openings. A crack that stayed dry all spring becomes a water entry point in August.
Therefore, a Scottsdale assessment is not just about spotting cracks. It is about judging whether water has already gotten behind the surface, because that is what turns a $400 patch into a section replacement. Everything in the checklist below builds toward answering that one question.
What Is Behind Stucco Walls, and Why It Matters
Behind a typical stucco wall sits a layered assembly: a moisture barrier of tar paper over the sheathing, then metal lath or chicken wire fastened over the paper, with the stucco coats applied on top of that. The stucco you see is the shell; the paper behind it is the actual waterproofing. Understanding those layers changes how you read every crack and stain.
This is the part most homeowners never think about until something goes wrong. The stucco itself is not what keeps water out of your framing. Stucco absorbs some moisture by design and releases it as it dries. The tar paper behind it sheds whatever gets through. As long as that paper is intact, a cracked wall is a cosmetic problem. Once the paper tears, the same crack becomes a path to wet sheathing, stained drywall, and framing damage.
Here is why a crack left alone for years is worse than the same crack fixed early. Building paper ages. Behind an old crack that has cycled through years of heat and moisture, the paper turns brittle. When the wall flexes, brittle paper tears instead of bending. At that point, the repair is no longer about filling a crack; it is about opening the wall, replacing paper and lath, and rebuilding the stucco over it.
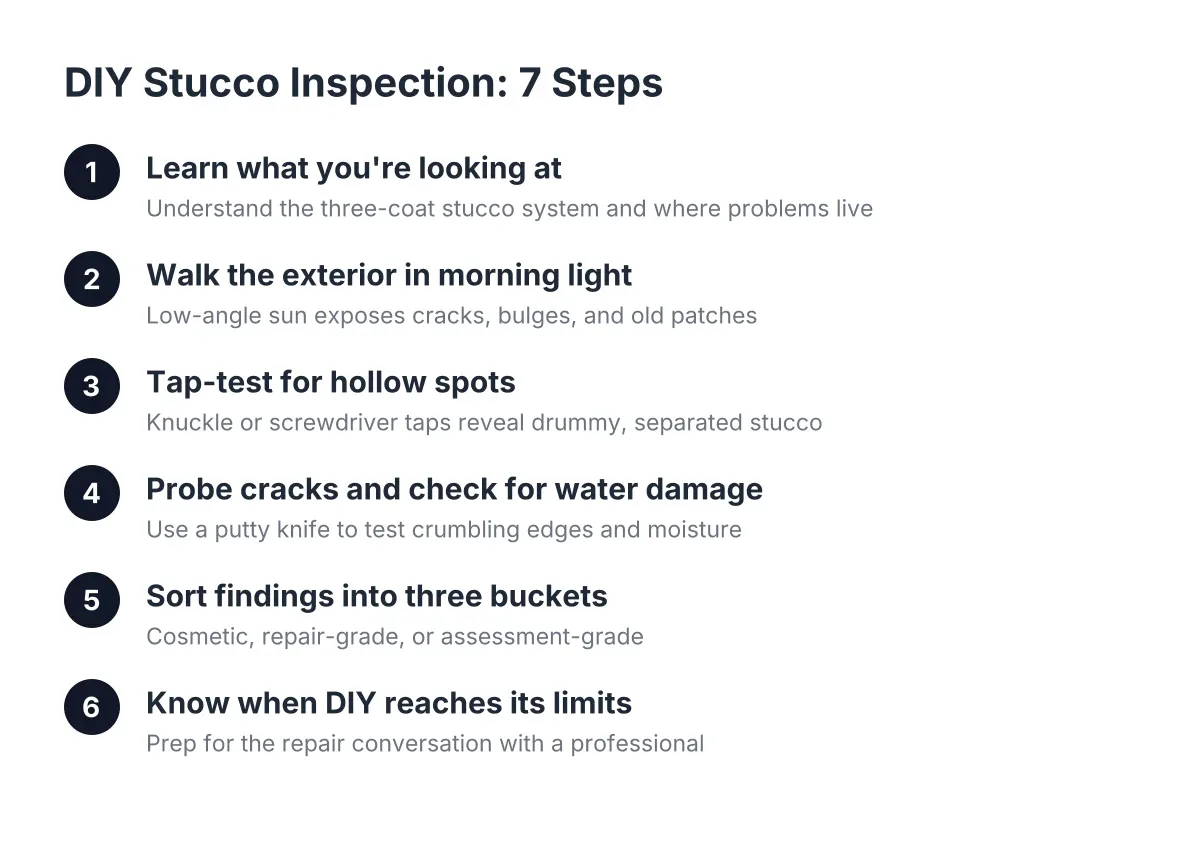
The layers also explain the standard three-coat system you will hear contractors mention:
- Scratch coat. The first cement layer, pressed into the metal lath and scored so the next coat grips it.
- Brown coat. The leveling layer that builds most of the thickness and flattens the wall.
- Finish coat. The thin outer layer that carries the color and texture you see.
Traditional three-coat stucco over lath runs about 7/8 of an inch thick as a common standard. Newer one-coat systems over foam board are thinner, often around 3/8 to 1/2 inch of cement over the insulation. Knowing which system you have tells you how deep a hole really goes and what a proper repair involves.
How to Tell What You Have: Identifying Your Stucco Wall Assessment Checklist Details Without Opening the Wall
Look at any existing opening first. A hole from a removed light fixture, a hose bib penetration, or the edge around an electrical box will show you the layers in cross section. If you see nearly an inch of gray cement, you have three-coat. If you see a thin cement shell over white or blue foam, you have a one-coat foam system.
In addition, check the house's age. Many older Scottsdale homes carry traditional three-coat stucco, while a lot of newer construction uses one-coat systems. Neither is wrong, but they fail differently and get repaired differently, so the answer shapes your repair path.
Stucco Wall Assessment Checklist: Step by Step
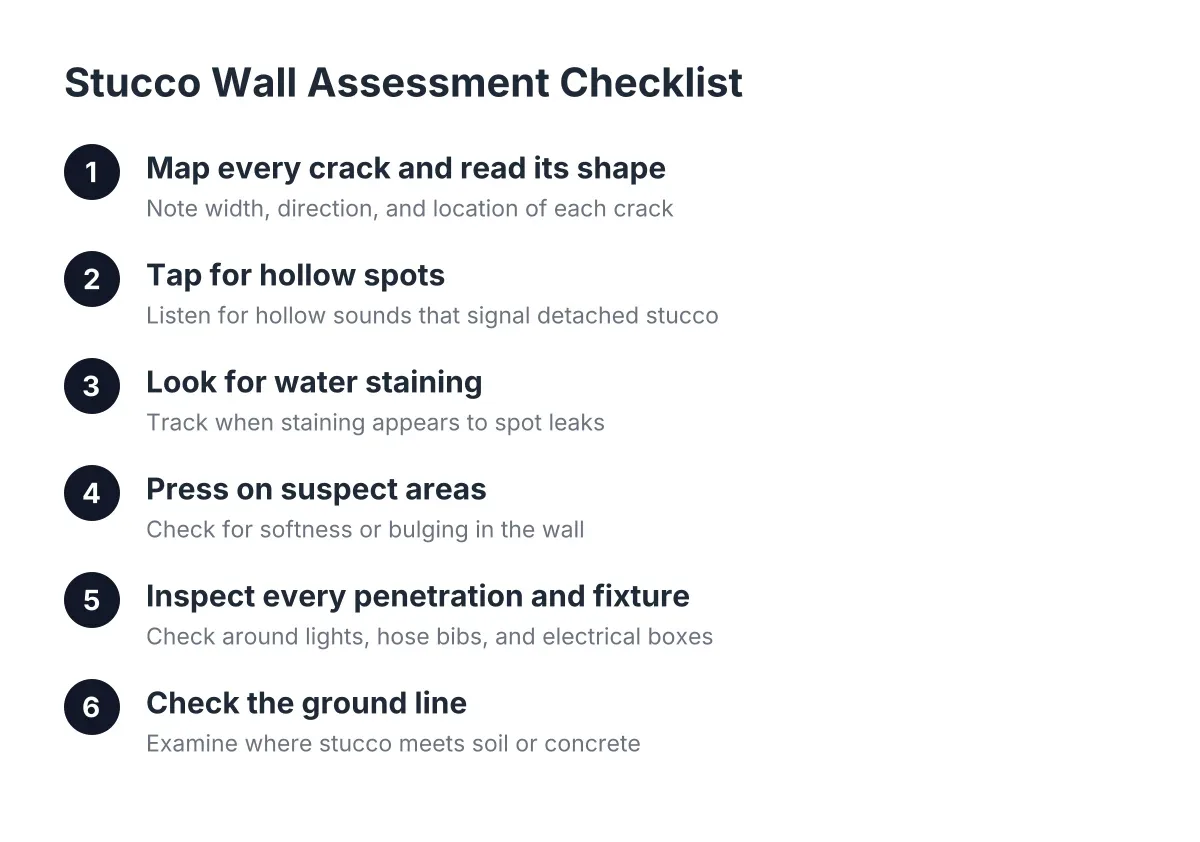
A complete stucco wall assessment checklist covers six checks: cracks, hollow spots, water staining, soft or bulging areas, penetrations and fixtures, and the ground line where stucco meets soil or concrete. Work around the house one wall at a time, in good morning light, and write down what you find and where. The notes matter more than you expect when you compare quotes later.
1. Map every crack and read its shape
Crack shape tells you the cause. Walk each wall and note three things about every crack: width, direction, and location.
- Hairline cracks thinner than a credit card, scattered randomly or spidering across a wall, are usually normal shrinkage or thermal movement. Watch them, seal them, do not panic over them.
- Diagonal cracks running from the corners of windows and doors signal stress concentration and often settling. These are the ones that grow every summer, and they deserve stucco crack repair before monsoon season, not after.
- Stair-step or long horizontal cracks, especially wider at one end, can point to foundation movement. This pattern is where a structural opinion earns its cost.
- Cracks wider than about 1/8 inch are open doors for wind-driven rain regardless of cause. Wide cracks get filled with backer rod, a closed-cell foam cord that creates a backing inside the crack before sealant goes in, according to Sika. If a previous repair on your wall is just caulk smeared over a wide gap, expect it to fail.
2. Tap for hollow spots
Tapping on a stucco wall and listening for a hollow sound versus a solid sound is the standard field method for finding areas where the stucco has separated from what is behind it. Use your knuckles or the handle of a screwdriver. Solid stucco sounds dense and flat. Detached stucco sounds like tapping a drum.
Tap in a grid pattern around any crack, stain, or previous patch, and around wall corners near AC units. Mechanical equipment sitting close to a wall transmits vibration into it over years, and combined with water pooling at the foundation, corners near condensers are a common failure spot. Mark hollow zones with painter's tape so you can show their full extent later. A hollow area larger than a dinner plate is past the patch stage; the loose material has to come off before anything new can bond.
3. Look for water staining and track when it appears
Staining that shows up after every storm and takes days to fade means water is sitting inside the wall assembly, not just wetting the surface. Fresh surface wetness dries in hours in Scottsdale. Deep saturation does not.
Check below window sills, under roof-to-wall transitions, around scuppers and canales, and along the bottom two feet of every wall. White chalky streaks are efflorescence, minerals carried out of the wall by water moving through it. Efflorescence is not dirt; it is a receipt proving water passed through the stucco.
4. Press on suspect areas for softness or bulging
Sound stucco is hard. Press firmly on stained areas, hollow-sounding zones, and the wall around cracks. Any give, flexing, or visible bulge means the material behind the surface has degraded, usually from long-term water exposure. A soft, stained, hollow section is the classic profile of water damage stucco repair, and it will not get cheaper by waiting through another monsoon.
5. Inspect every penetration and fixture
Every hole through stucco is a potential leak. Check the sealant around hose bibs, light fixtures, electrical boxes, vents, and anywhere a fixture was removed and the hole was left open or loosely caulked. A single unsealed lag bolt hole from an old satellite dish can feed water behind the paper for years before you see a stain inside.
6. Check the ground line
Stucco should stop above grade with a visible weep screed, the metal strip at the bottom that lets moisture drain out of the wall. If soil, gravel, or a raised planter buries the bottom of the stucco, water wicks up into the wall continuously. Note anywhere stucco touches dirt; fixing the grading is often part of fixing the wall.
Answering the DIY Questions Before You Drill or Hang Anything
Many people run through this kind of inspection because they want to mount something, not because the wall looks damaged. The construction details above answer those questions too.
Does a stud finder work through stucco?
A standard stud finder does not work reliably through stucco because the cement thickness and the embedded metal lath confuse the sensor. The lath reads as metal across the entire wall, so a magnetic or metal-scanning finder lights up everywhere. Density-based finders struggle to read framing through 7/8 inch of cement.
Instead, find studs from indoors on the same wall and transfer measurements outside from a shared reference point like a window edge or corner. On one-coat foam systems, some deep-scan finders work; on traditional three-coat over lath, plan on measuring. When you do drill, use a masonry bit through the stucco, then switch to a wood bit for the stud, and seal the penetration with exterior sealant so you are not creating the exact leak path described in check five.
How thick is stucco supposed to be?
Traditional three-coat stucco over lath is built to about 7/8 of an inch: a scratch coat, a brown coat, and a thin finish coat. One-coat systems run thinner, commonly 3/8 to 1/2 inch of cement over foam insulation board. If a hole in your wall shows less thickness than that with no foam behind it, the original application was thin, which helps explain why it cracked or crumbled.
Reading Your Results: Patch, Repair, or Replace
Once the walk-around is done, your notes sort into three buckets, and each points to a different repair path.
Patch territory. Hairline cracks, a small impact hole with solid material around it, and no staining or hollow sound nearby. This is stucco patching, and it is a legitimate small job. Homeowners often assume a single hole is too small for a real stucco contractor to bother with; a focused local stucco outfit handles exactly this kind of work, and the hard part is not the patch itself but the color matching and texture matching that make it disappear.
Repair territory. Cracks wider than 1/8 inch, hollow zones up to a few square feet, localized staining, or damage around penetrations. Here the loose material comes off with scrapers and wire brushes, the paper and lath get checked and fixed if needed, and new stucco gets built back in layers. Any repair also depends on prep; the surface must be clean of loose debris, dust, and oils, because contamination stops the new material from bonding to the old, and a patch that never bonded is the one that pops out a year later.
Replacement territory. Large hollow or soft areas, staining that keeps returning, bulging sections, or crumbling at the base of the wall. This means opening the wall, replacing torn paper and rusted lath, and rebuilding the full system across that section. For budget context, Fixr.com puts the national average cost to repair stucco at $900 to $3,000, averaging around $1,700 for repairing buckled three-coat stucco in a 10×10-foot area. Small patches land below that range; multi-wall water damage lands above it.
One honest limitation: this checklist finds surface evidence, not hidden moisture. A wall can hold wet sheathing behind stucco that still looks and sounds fine. If your notes show recurring stains, soft spots, or interior signs like musty smells or bubbling paint near an exterior wall, bring in a professional with a moisture meter rather than guessing. The same goes for stair-step cracking, which needs a structural read, not a cosmetic one.
Using the Checklist When You Are Selling the House
Suppose you are three weeks from listing a Scottsdale home and the pre-listing walkthrough, or your realtor, flags cracked stucco on the west wall and a patched hole by the garage that does not match. In that scenario, running this stucco wall assessment checklist before calling anyone changes the conversation. You can tell a contractor the crack is diagonal off a window corner, about 1/16 inch wide and four feet long, the wall sounds solid, and the old patch is a texture mismatch, not damage.
That description gets you an accurate scope instead of a padded one. A typical sale-driven fix in that scenario, crack repair plus re-texturing and color matching one patch, is a fast, bounded job in the low hundreds to low thousands, not a resurfacing project. Estimated ranges only; the wall itself sets the price. Your written notes also become the backbone of a clean disclosure: what was found, what was fixed, and when.
Buyers' inspectors will tap the same walls you tapped. Finding the hollow spot yourself in March beats having it surface in an inspection report ten days before closing.
After the Assessment: Getting the Repair Judged Right
A thorough stucco wall assessment checklist ends with a decision, and the deciding factor is almost always whether water reached the paper. Cosmetic cracks and impact holes are straightforward fixes when the layers behind them are intact. Staining, softness, and hollow sound together mean the assembly, not just the surface, needs attention.
Two practical points as you move from assessment to repair. First, insist that whoever quotes the job looks at the actual wall; the difference between a patch and a paper-and-lath rebuild is invisible over the phone. Second, ask how they will match the existing finish. On a wall with uneven fading or multiple shades, the careful approach is to remove a small sample piece and match color against it rather than eyeballing from a fan deck, and any fixtures or covers on the repaired wall should be painted to match so the repair does not announce itself.
Do the walk-around before monsoon season, write down what you find, and let the wall's actual condition, not a guess, set the repair path. That hour of checking is the difference between fixing a crack once and paying to fix the wall behind it later.
If you need stucco repair, Scottsdale Stucco Repair can help.
Related guide: Stucco Wall Assessment — Complete Guide
Prefer to talk it through? Call (480) 637-3464 — a quick call is usually the fastest way to get a straight answer for your situation.