Signs Your Stucco Needs an Inspection Before the Damage Gets Structural
Most Scottsdale homeowners do not think about stucco inspections until something forces the issue: a crack by the window that gets longer every summer, a hollow-sounding patch after a monsoon, or an HOA letter about exterior wall damage. By that point, the question is no longer whether the wall needs attention. The question is how far the damage has gone behind the surface, and whether you are looking at a simple stucco patch or a section that needs to come off. This guide walks through the warning signs that mean your wall needs a real assessment, what is actually behind your stucco, and how to check your own wall before you call anyone.
Stucco is not a decorative skin. In Arizona, it is usually the primary weather barrier on the house. According to the National Association of Home Builders, stucco remained the most-used exterior wall material in the Mountain division, which includes Arizona, at 48% of new single-family homes started in 2024. That means roughly half the homes in a typical Scottsdale neighborhood depend on this one material to keep water out. Most homes in the area built before 2010 wear a traditional three-coat stucco system, and many of those walls are now 20 to 40 years old. When stucco fails quietly, it fails expensively.
Why Stucco Damage Gets Worse While You Wait
Stucco problems rarely stay the same size. The material is layered, and each layer protects the one behind it. Once the outer coat cracks or detaches, water reaches the layers that were never designed to face weather directly. Because stucco is rigid, it does not sag or peel the way siding or paint does. Instead, it cracks in thin lines, separates from the wall behind it, and holds moisture against the structure while the surface still looks mostly fine.
Here is the part most homeowners do not know. Behind the stucco sits a moisture barrier, usually tar paper, fastened to the framing. Metal lath or chicken wire goes over that paper, and the stucco is applied on top. That paper is the real waterproofing. The stucco itself sheds most of the water, but the paper catches what gets through.
The problem is age. When a structural crack sits open for years, the building paper behind it dries out and turns brittle. Then normal wall flexing, the kind every house does through Scottsdale's temperature swings, can tear the brittle paper. At that point water is no longer stopped at the paper. It reaches the sheathing and framing, and a crack repair becomes water damage stucco repair, or worse, a framing repair hidden behind a wall.
This is why timing matters more than the size of the visible damage. A quarter-inch crack that is two years old is often a smaller job than a hairline crack that has been open for fifteen.
Seven Signs Your Wall Needs a Stucco Inspection Now
Some stucco damage is cosmetic. Some of it is a countdown. These are the signs that separate the two, roughly in order of urgency.
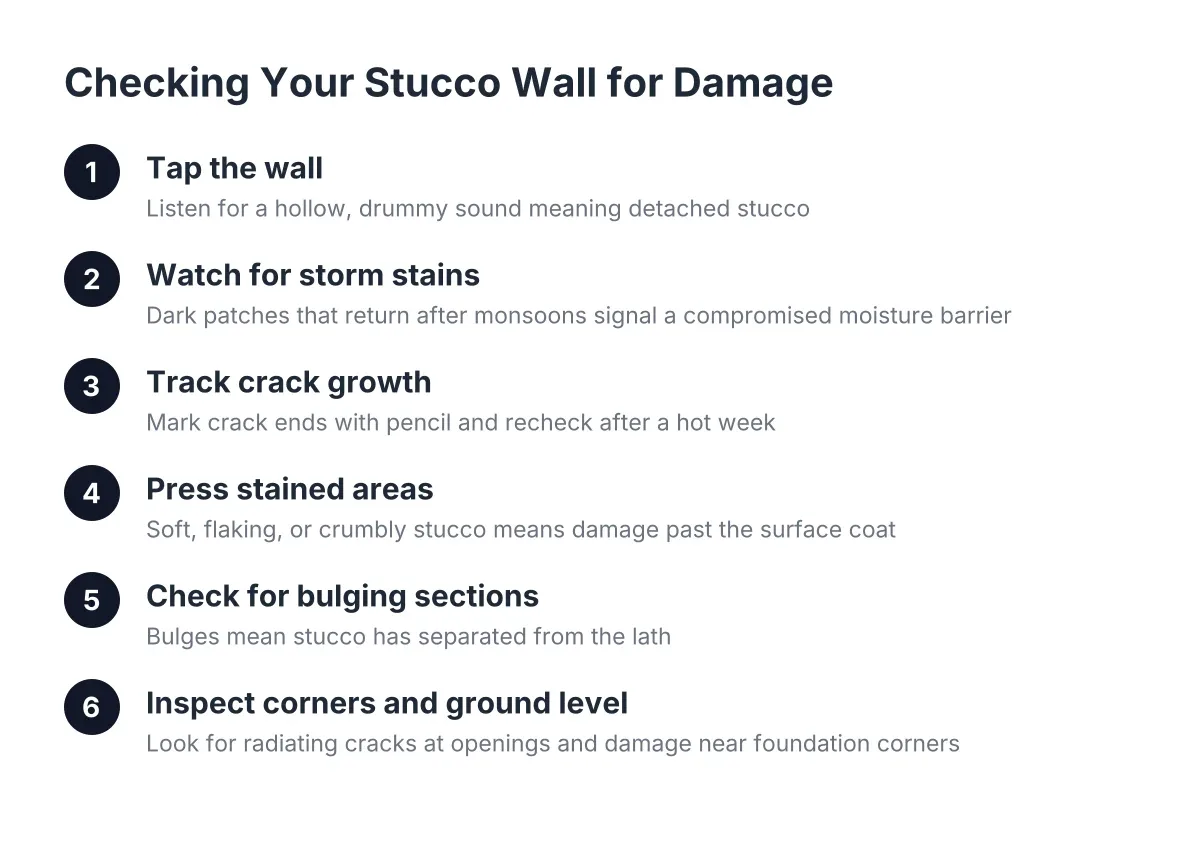
- A hollow sound when you tap the wall. Solid stucco sounds dense when you knock on it with a knuckle or the handle of a screwdriver. A hollow, drummy sound means the stucco has detached from the substrate behind it, often because a bonding agent was skipped or has failed. Hollow stucco is still hanging on the lath, but it is no longer attached, and a hard rain or an impact can bring the whole detached section down. Detached stucco cannot be patched over; the loose section has to come off.
- Stains that appear after every storm. A wall that shows a dark patch after each monsoon rain and then dries out is telling you water is getting behind the surface and sitting there. Watch the same spot through two or three storms. If the stain returns in the same place, the moisture barrier behind that section is compromised somewhere above the stain, since water travels down inside the wall before it shows. Look closely below windows, at the base of walls, and around scuppers and parapets.
- A crack that grows. Mark the end of the crack with a pencil and check it after the next hot week. Hairline cracks from normal curing tend to stay put. Cracks that lengthen through summer expansion cycles are moving with the structure, and they are wider and deeper than surface cracks. These need proper crack repair with backer rod and sealant, not a coat of paint.
- Soft or crumbly spots. Press on a stained area. If the stucco gives, flakes, or crumbles, water has already broken down the material. A weak patch you can dent with a fingertip cannot be skimmed over; it has to be broken out and rebuilt, because the failure is in the material or the application underneath, not the surface.
- Bulging or buckling sections. A visible bulge means the stucco has separated from the lath and is being pushed outward, usually by swollen wood or trapped moisture behind it. All loose or buckling material has to come off before any repair, because leaving it in place lets every rain keep expanding the wood underneath.
- Cracks radiating from window and door corners, or spider-web patterns. Openings concentrate stress. A single short diagonal crack at a corner is common. A network of cracks spreading from multiple corners suggests movement or a lath problem worth a closer look. Where installers skipped or poorly executed the expansion and contraction channels that let the wall move, cracks tend to radiate from window corners and door frames. Separately, spider-web or map cracking across a broad area usually points to a problem in the coat beneath the finish, not just surface shrinkage — often a prior repair with the wrong mix or a coat applied too thin. These areas tend to fail as a section rather than a line, which is why they deserve assessment rather than a tube of caulk.
- Damage near ground level at corners. Corner damage low on the wall often traces back to two things working together: vibration from nearby mechanical equipment such as an AC condenser, and poor drainage that pools water against the foundation. Corners near air conditioning units crack more often than any other spot on a Scottsdale home. If a corner near your AC pad is crumbling, look at the grading and the unit's mounting as well as the stucco. Fix the drainage or the repair will not last.
Do not overlook holes and old fixture scars, either. A hole from a ladder strike, a removed satellite dish, or an old light fixture looks minor. It is not, because every hole is an open door through the finish coat, and if it punched through the paper, it is an open door to the framing. Holes also collect water at their bottom edge. A proper stucco hole repair seals the barrier, ties new lath into old, and rebuilds the coats, which is why a smear of patch compound rarely holds.
One reassuring note on corners. A crack right where the stucco meets a hard concrete foundation is usually minor, not structural. The concrete and the stucco expand and contract at different rates, and the joint between them cracks as a result. It still deserves sealing to keep water out, but it is rarely a sign of trouble in the wall itself.
What Is Actually Behind Your Stucco Wall
Behind a typical stucco wall in Scottsdale, from outside in, you will find the stucco itself, metal lath or wire, a tar paper moisture barrier, wood sheathing or open framing, and then the wall studs. On newer homes, the stucco may be a thin coat over foam board instead. Knowing which assembly you have changes every repair decision.
The traditional build is the three coat stucco system. Here is how to tell stucco layers apart if you ever see a cross-section at a hole or a removed fixture:
- Scratch coat. The first layer, pressed into the metal lath and scored horizontally so the next coat can grip it.
- Brown coat. The middle layer that builds thickness and flattens the wall.
- Finish coat. The thin outer layer that carries the color and texture you see.
So how thick is stucco? Traditional three coat stucco over lath is generally about seven-eighths of an inch thick in total, which is the common standard for framed walls. Over concrete block, common on Scottsdale perimeter and community walls, the stucco is thinner because the block itself provides the structure. Newer one coat systems over foam run thinner still, often around half an inch of cementitious material. If you are wondering how thick your stucco is, the edge of a hose bib penetration, a dryer vent, or an electrical box often exposes a cross-section you can measure without opening the wall.
Thickness matters for diagnosis. If you can see the wire through a chip or a hole in the wall, the coats were applied thin or the finish has eroded, and a skim patch will not hold. If a hole shows a full seven-eighths inch of layered material with intact paper behind it, a straightforward stucco hole repair is usually all you need.
Can You Use a Stud Finder on Stucco?
A standard stud finder does not work reliably on stucco because the metal lath behind the surface reads as continuous metal, masking the wood studs behind it. Magnetic finders lock onto the lath fasteners instead of studs. For hanging heavy items, measure from a window or outlet, since studs typically sit 16 inches on center.
This question comes up constantly, and it reveals something useful about your wall. If a magnetic stud finder for stucco pings all over the surface, you have metal lath, which usually means a traditional three coat system. If it finds little metal, you may have a foam-backed system with plastic lath or a synthetic finish. That distinction matters when you get repair quotes, because the two systems are patched with different materials and methods.
For drilling, use a masonry bit through the stucco, then switch to a wood bit once you hit sheathing or a stud. Seal every penetration you make. An unsealed screw hole is a small, slow version of the same water path a crack creates.
How to Do Your Own Stucco Wall Assessment
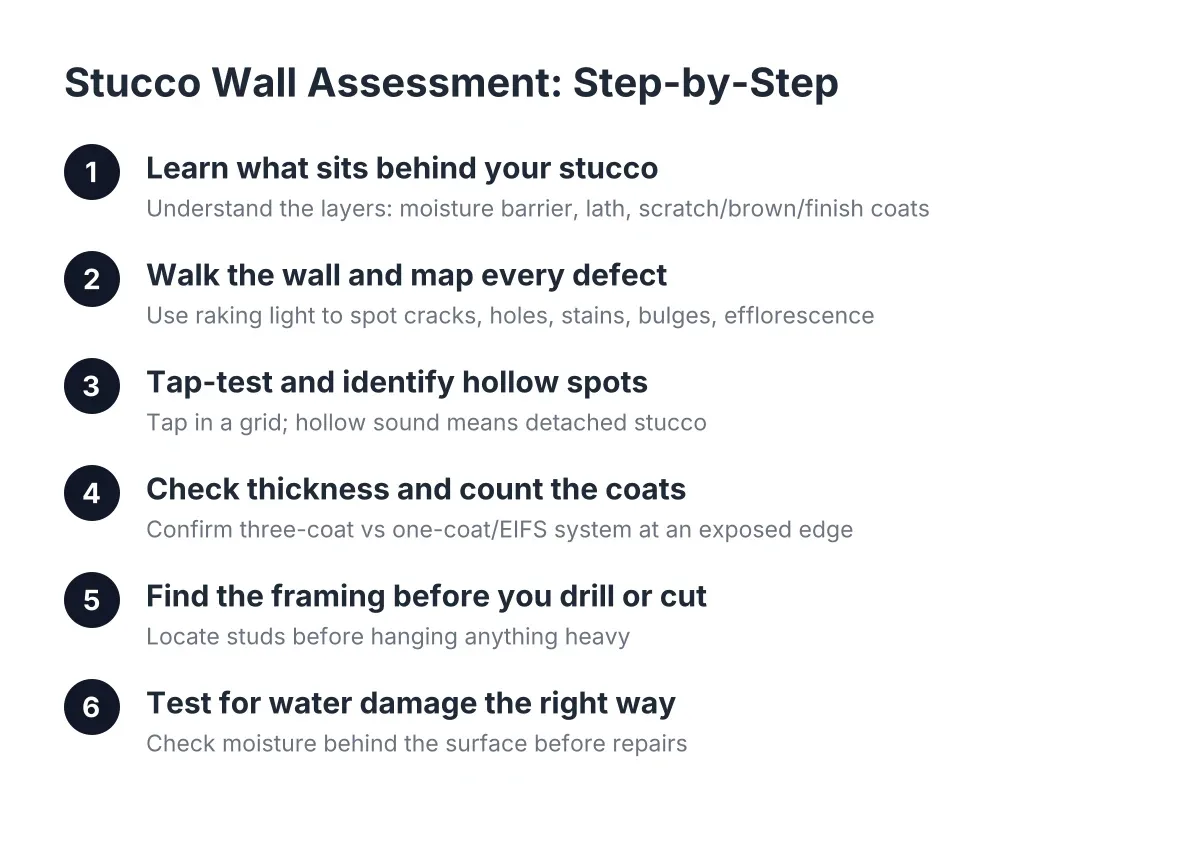
Before you pay anyone, spend thirty minutes doing a basic Stucco Wall Assessment yourself. You will not replace a professional evaluation, but you will know whether you are calling about a patch or a project, and you will spot the contractor who quotes you without looking at the wall.
Work through the exterior in this order:
- Stand back first. From 15 feet away, look for discoloration, bulges, and crack patterns you miss up close.
- Walk the walls in raking light. Early morning or late afternoon sun hitting the wall at a low angle shows bulges, patches, and texture mismatches that disappear at noon.
- Tap suspect areas. Use your knuckle or a screwdriver handle, knocking in a grid pattern around stains and cracks. Map where the sound changes from solid to hollow, and mark the boundary with painter's tape. That boundary is roughly the edge of the detached area.
- Probe stains gently. Press stained or discolored spots with a thumb. Note anything soft, damp, or crumbly. Anything that flexes or dents under light pressure has failed underneath.
- Measure and date the cracks. Photograph each crack with a coin next to it for scale, and note where each one starts — cracks radiating from window and door corners suggest movement; random hairlines suggest normal shrinkage. A crack wider than a credit card edge, about a sixteenth of an inch, is past the hairline category. A coin next to a crack today lets you prove growth in three months.
- Check the water paths. Look at where roof runoff lands, where the AC condensate drips, where irrigation spray hits the wall, and where grade slopes toward the foundation. Look where stucco meets the ground or hardscape, too — stucco buried in soil or planter dirt wicks moisture constantly. Most stucco water damage starts with a water source you can see from the ground.
- Inspect terminations and penetrations. Look along the bottom edge of the wall for the weep screed, the perforated metal strip that lets trapped water drain out. Soil or concrete piled above it traps water inside the wall. Then check hose bibs, vents, light fixtures, and conduit, which are the most common leak points, for gaps and failed sealant.
One caution on cleaning. Do not pressure wash a wall you suspect has cracks or hollow spots. High pressure drives water through every gap in the layered assembly, and moisture forced behind stucco can turn a cosmetic problem into a structural one over time. If the wall has heavy staining or growth from a shaded, damp exposure, expect that cleaning may take more than one gentle treatment rather than one aggressive blast.
Also resist the urge to pick at loose material and then leave it. Any loose or buckling stucco does need to come off before repair, but once you expose paper or lath, that opening needs to be covered promptly, especially between June and September.
When DIY Checks End and Professional Stucco Inspections Begin
A homeowner's tap test and crack survey answer the first question: is something wrong. Professional stucco inspections answer the second: how far has it gone. That second question usually requires moisture readings, sometimes small test openings, and judgment about what the readings mean for that specific wall assembly.
A stucco inspector or an experienced repair contractor brings three things you do not have. First, moisture meters that read what is happening inside the wall without opening it. Second, pattern recognition; someone who has opened hundreds of Scottsdale walls knows whether a corner crack near an AC unit is vibration, drainage, or both. Third, the ability to open a small test area cleanly and tie the repair back in with color matching and texture matching so the investigation itself does not scar the wall. Tapping and pressing find detachment and soft spots, but they cannot tell you how wet the framing is or whether the paper is torn.
Call in a professional when any of these apply:
- Hollow areas larger than a couple of square feet, or hollow sounds across multiple walls
- Recurring stains at the same spot after storms, especially below windows or roof-wall intersections
- Any softness, bulging, or buckling, which means the substrate is already involved
- Interior signs paired with exterior ones, such as a musty smell or bubbling paint on the inside of an exterior wall
- A pending sale, since buyers' inspectors will flag stucco issues and you want to know first
- An HOA violation letter, because you will need a documented scope of work, not just a patch
Understand the trade-off between inspection types. A non-invasive assessment uses visual checks, tapping, and surface moisture meters; it is faster and leaves no marks, but it can miss moisture trapped deep in the assembly. An invasive assessment drills small probe holes to read moisture at the sheathing; it is more definitive but leaves holes that need patching afterward. For a single crack or an impact hole, non-invasive is almost always enough. For a wall with recurring stains and hollow zones, probing may be the only way to scope the job honestly. Ask which approach fits your situation before agreeing to either, and ask how any test holes will be patched.
Cost context helps here too. Standalone stucco inspection cost varies by home size and whether moisture probing is involved, and many repair contractors fold the assessment into a repair quote instead of charging separately. According to Fixr.com, the national average to repair stucco runs $900 to $3,000, averaging around $1,700 for repairing buckled three coat stucco in a 10×10-foot area. An assessment that catches the problem before it reaches buckling is what keeps you at the low end of that range, or below it entirely with simple stucco patching.
What Your Findings Mean for the Repair Path
The point of all this looking and tapping is a decision: patch, repair a section, or replace and resurface. Your findings map to those paths directly, and knowing the map keeps you from over-buying or under-buying the fix.
Stable hairline cracks with no staining usually mean crack repair, filled and finished to match. Growing cracks or corner cracks near equipment mean crack repair plus fixing the cause, whether that is drainage, a vibration source, or a missing control joint. Hollow areas and soft patches mean the failed material comes out entirely and the section gets rebuilt from the lath up, working bottom to top the way stucco is properly applied. Widespread map cracking or repeated water damage across multiple walls pushes the conversation toward stucco replacement or resurfacing rather than chasing patches forever.
Whatever path you land on, two details separate a repair that disappears from one you will stare at for years. The surface has to be clean before new material goes on, because dust, oils, or old paint film will break the bond and turn today's repair into next year's hollow spot. And the color and texture have to be matched deliberately, since Scottsdale finishes range from smooth to heavy lace and a mismatched patch reads from the street.
What This Looks Like on a Real Scottsdale Wall
Suppose a homeowner in north Scottsdale notices a diagonal crack running from the corner of a west-facing window. It was hairline two summers ago. Now it is wide enough to catch a fingernail, and after the last monsoon a gray stain bloomed below it for three days before fading.
In that scenario, the tap test around the stain sounds hollow in a patch about the size of a dinner plate. The crack itself has grown with two summers of expansion cycles, which puts it in the structural category rather than hairline. A structural crack that wide needs backer rod, the closed-cell foam cord that creates a foundation inside the crack before sealant goes in, as Sika describes it, followed by a stucco patch and color matching. Painting over it would hide it until October and reopen it by June.
The hollow zone is the bigger finding. Detachment plus recurring staining suggests the paper behind that section has been wet repeatedly, and possibly torn. The honest scope is to remove the detached stucco, inspect the paper and sheathing, replace what is compromised, re-lath, and rebuild the coats with texture matching so the repair disappears into the wall. That is a repair measured in a few square feet, not a re-stucco of the house. Caught a year later, after the sheathing swells and the bulge appears, the same wall could need triple the work. Same wall, same original defect, different year, different bill.
The same logic applies at community scale. An HOA board reviewing perimeter block walls before its annual reserve-study inspection faces the identical question with more square footage: which cracks are cosmetic joint movement, and which sections are detaching. A documented assessment gives the board comparable bids on a defined scope instead of three contractors guessing at three different jobs.
The Bottom Line for 2026
Stucco fails from the inside out, and by the time damage is obvious from the curb, the layers behind the surface have usually been involved for a while. The homeowners who spend the least on stucco repair are not the ones with the newest stucco. They are the ones who treat a growing crack, a hollow tap, or a repeating stain as a deadline, not a cosmetic note — the ones who caught the hollow sound in July instead of the rotted sheathing in December.
Do the thirty-minute walk-around before monsoon season, mark what you find, and match the finding to the response: seal the minor foundation-line cracks, patch the small holes properly, and get a real inspection on anything hollow, soft, or spreading. In a region where stucco covers nearly half of all new homes, knowing how to read your own walls is not a niche skill. It is basic home ownership, and in 2026 it is the difference between a patch this spring and a wall rebuild next year.
If you need stucco repair, Scottsdale Stucco Repair can help.
Prefer to talk it through? Call (480) 637-3464 — a quick call is usually the fastest way to get a straight answer for your situation.