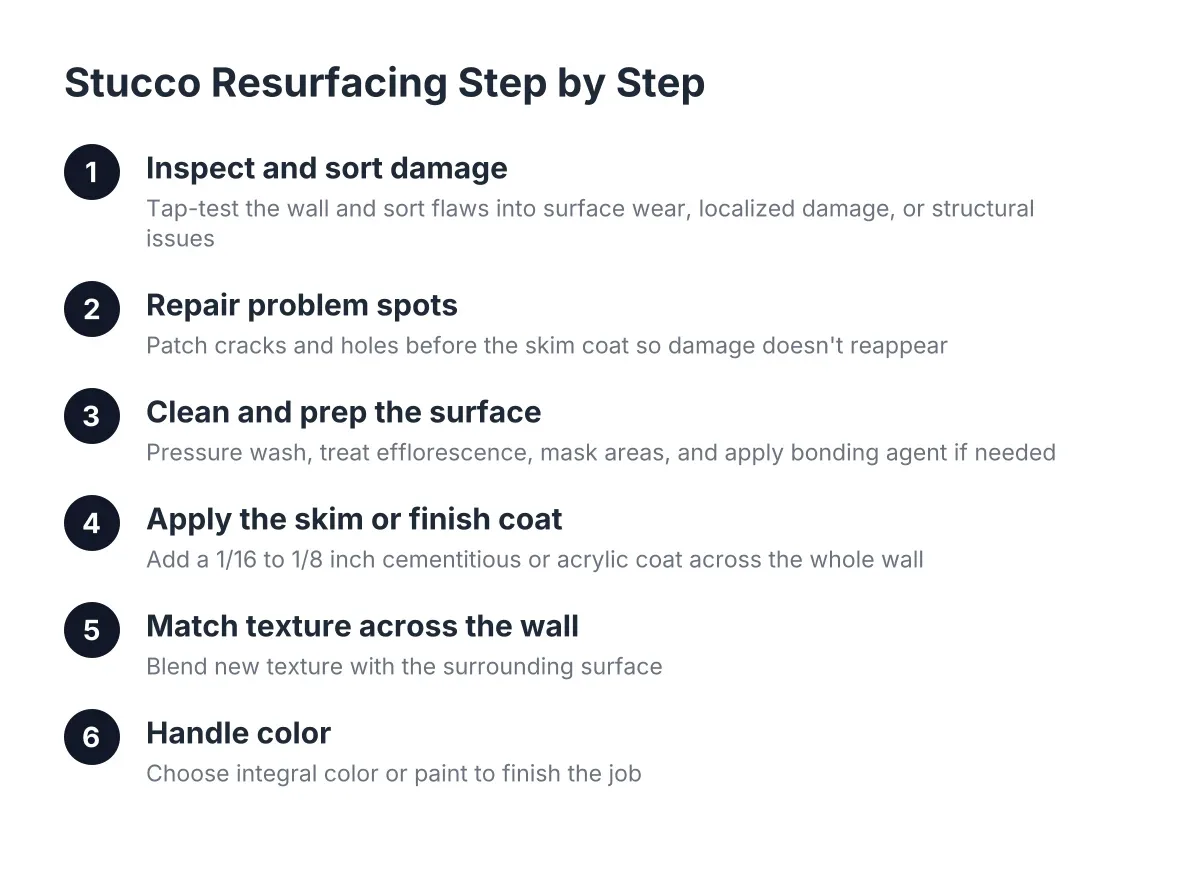
Stucco Resurfacing Step by Step: The Repair Option Most Contractors Skip
If your stucco looks tired but the wall underneath is still solid, you have three options, not two. Most homeowners hear about small stucco patch repair for cracks and holes, or full replacement that strips the wall down to the lath. Resurfacing sits in the middle: a new finish coat over the existing stucco that erases the worn look without tear-off costs. This guide walks through the resurfacing process step by step, so you know what a proper job looks like in Scottsdale and where a simple patch or a full replacement makes more sense.
Why Resurfacing Gets Skipped, and When It Fits
Resurfacing gets skipped because it earns less than replacement and takes more skill than a quick patch. A contractor selling full replacement quotes one big number. A contractor doing resurfacing has to evaluate the existing wall, fix problem spots first, and match texture across the whole surface. That evaluation work is exactly what protects your budget.
Resurfacing fits when the base coats are sound. That means the stucco is still bonded to the wall, there is no widespread water damage behind it, and the problems are surface-level: fading, chalking, hairline cracking, old patch scars, or a texture you no longer want. In Arizona this describes a lot of homes. Stucco remained the most-used exterior wall material in the Mountain division at 48% of new single-family homes started in 2024, according to the National Association of Home Builders, so tired-but-sound stucco is a common condition here, not a rare one.
It does not fit when stucco sounds hollow when tapped, bulges away from the wall, or shows staining that points to water behind the surface. In those cases a new finish coat just hides a problem that keeps growing. Water damage stucco repair or partial replacement has to come first.
Step 1: Inspect the Wall and Sort Damage into Three Buckets
Walk the whole wall in raking light, early morning or late afternoon, when shadows reveal every flaw. Tap suspect areas with a knuckle or the handle of a screwdriver. Solid stucco sounds dense; delaminated stucco sounds hollow. Sort everything you find into three buckets:
- Surface wear: fading, chalking, hairline cracks under about 1/16 inch, mismatched old patches. Resurfacing handles all of this.
- Localized damage: cracks wider than 1/16 inch, holes in a wall from impact, crumbling around penetrations. These need stucco crack repair or stucco hole repair before the new coat goes on.
- Structural or moisture problems: hollow-sounding sections, bulges, rust stains, soft spots near grade or roof lines. These need a professional evaluation, and possibly replacement of that section, before resurfacing is even on the table.
Does resurfacing fix cracks? It hides hairline cracks and, with the right prep, keeps them from telegraphing back through. It does not fix moving cracks. A crack that opens and closes with temperature swings will reappear through any coating unless it is repaired properly first.
Step 2: How to Complete a Stucco Patch Repair on Problem Spots
A resurfacing coat is only as good as the wall under it, so every crack and hole gets repaired before the skim coat. This is the step rushed crews compress or skip, and it is why some resurfaced walls show ghost lines of old damage within a year.
For cracks, the repair means opening the crack in a shallow V, cleaning out loose material, and filling with a flexible or cementitious repair material matched to the crack's behavior. For holes, it means cutting back to sound stucco, checking the lath and paper behind the hole, and rebuilding the patch in layers. Larger repairs cost real money on their own; the national average cost range to repair stucco is $900 to $3,000, averaging around $1,700 for a buckled 10×10-foot area of three-coat stucco, according to Fixr.com. Folding that repair work into a resurfacing project usually costs less than handling it as a separate job later.
A note on DIY here: a stucco patch kit or pre-mixed stucco patch from a hardware store works fine for a nail hole or a single hairline crack. For a wall about to be resurfaced, patch material choice matters more, because the patch has to accept the new finish coat the same way the surrounding stucco does. A pre-mixed acrylic patch next to a cementitious wall can flash through the finish as a smooth spot.
Step 3: Clean and Prep the Entire Surface
Next, the whole wall gets cleaned, not just the repaired areas. Dust, chalking paint, efflorescence, and dirt all break the bond between old stucco and the new coat. A typical prep sequence in Scottsdale looks like this:
- Pressure wash the wall at moderate pressure, working top to bottom.
- Scrape or grind any peeling paint or loose finish material.
- Treat efflorescence (white mineral deposits) so salts do not push through the new coat.
- Mask windows, doors, light fixtures, and hose bibs, and protect landscaping and concrete below.
- Apply a bonding agent or acrylic primer if the surface is painted, chalky, or dense.
The bonding agent question is where jobs quietly go wrong. Bare, absorbent stucco can take a cementitious skim coat directly after dampening. Painted stucco cannot; the new coat needs a bonder or an acrylic finish system designed to grip paint. Skipping this step is the most common cause of a resurfacing coat peeling in sheets two summers later.
Step 4: Apply the Skim Coat or New Finish Coat
Now the actual resurfacing happens. The crew applies a skim coat, a thin layer of cementitious or acrylic finish material, across the entire wall. Thickness typically runs 1/16 to 1/8 inch, enough to bury hairline cracking and old patch outlines but thin enough to avoid adding meaningful weight or cracking on its own.
There are two main paths, and the right one depends on the wall:
- Cementitious finish: traditional, breathable, and integral-color capable. It weathers the way the original stucco did, which helps long-term match on older Scottsdale homes.
- Acrylic finish: more flexible, better at bridging micro-cracks, and available in consistent factory colors. It goes over primed or painted surfaces more reliably.
Application is done in sections, keeping a wet edge so no lap marks show. On a hot Scottsdale afternoon, working the shaded side of the house and following the sun matters; finish coat that dries too fast is hard to texture and prone to shrinkage cracking. Cure time before texture and color work varies by product, from same-day for some acrylics to several days for cementitious coats, so build slack into your schedule.
Step 5: Match the Texture Across the Whole Wall
Texture matching is what separates a resurfacing job you forget about from one you notice every time you pull into the driveway. Common Scottsdale textures include sand float, dash (knockdown or heavy), lace, and smooth santa-fe style. The finisher recreates the existing texture with the same tools and timing used originally: a float for sand finishes, a hopper gun for dash, a trowel-and-knockdown pass for lace.
This step is also where resurfacing solves a problem the Block-Wall Upgrader knows well. Suppose a homeowner in north Scottsdale just had a block wall built along the patio, and the contractor left the cinder block bare. Stuccoing that new block wall is an installation job: scratch coat, brown coat, then finish. But matching it to a 20-year-old house is a resurfacing question, because weathered stucco and fresh stucco never look identical. In that scenario, resurfacing the adjoining house wall at the same time the new block gets its finish coat puts one uniform, same-age surface across both. The block wall stops looking like an add-on.
Step 6: Handle Color, Whether Integral or Painted
Color comes last, and there are two ways to get it. Integral color mixes pigment into the finish coat itself, so the color runs through the material and small future chips do not flash white. Paint or elastomeric coating goes on after cure and offers more color choices, but becomes a maintenance layer you will recoat every 8 to 12 years in Arizona sun.
Stucco color matching against weathered walls is genuine skill work. A sample panel on the actual wall, viewed at midday and at dusk, beats any color chip. If you are resurfacing the entire visible elevation, matching matters less because the whole plane is new. If you are resurfacing one wall and leaving others original, insist on a physical sample before the full application.
What Stucco Resurfacing Costs Compared to Patching and Replacement
For 2026 planning purposes, think of the three options as three price tiers. Small stucco patch repair on a few cracks or a single hole is the cheapest, often a few hundred dollars as an illustrative estimate, but it leaves the wall's overall look unchanged and patches can show. Full replacement is the most expensive because you pay for demolition, disposal, new lath and paper, and three full coats. Stucco resurfacing lands in between: you pay for prep, repairs, and one new finish system, and you skip tear-off entirely.
As an illustrative example, resurfacing a single-story home's street-facing elevations might run in the low-to-mid four figures, while replacing that same stucco could cost two to three times as much. Exact numbers depend on wall condition, texture complexity, and access, which is why an on-site look at the wall beats any phone estimate.
One honest trade-off: resurfacing does not reset the clock the way replacement does. If the underlying stucco has widespread delamination or the moisture barrier behind it has failed, resurfacing buys appearance, not longevity, and a professional inspection should settle that question before you spend money on a finish coat.
When to Call a Pro Instead of Reaching for a Patch Kit
Grab the stucco patch repair products at the hardware store for small, isolated, cosmetic fixes: one hairline crack, one nail hole, one scuffed corner. Call a stucco contractor when any of these apply:
- The damage covers more than a few square feet or repeats across multiple walls.
- The wall sounds hollow, bulges, or shows water staining.
- You want the repair to disappear, which requires texture and color matching across a larger area.
- You are finishing new block, a fence, or an addition and need it to match the existing house.
For Scottsdale homeowners, resurfacing is the option worth asking about by name. Bring it up when you collect quotes. A contractor who evaluates whether your wall qualifies, rather than defaulting straight to replacement, is telling you something useful about how they work.
If you need stucco repair, Scottsdale Stucco Repair can help.
Prefer to talk it through? Call (480) 637-3464 — a quick call is usually the fastest way to get a straight answer for your situation.